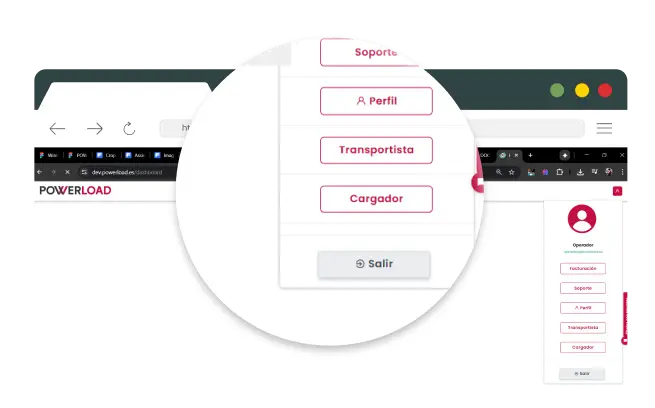
Cambiar Perfil a Cargador

En el menú superior selecione Perfil.
Haz clic en "Cargador".
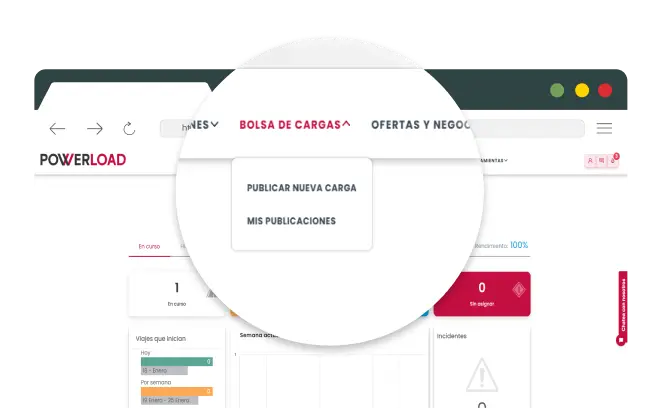
Crea una Carga
Ve al menú BOLSA DE CARGAS y haz clic en "Publicar Nueva Carga"
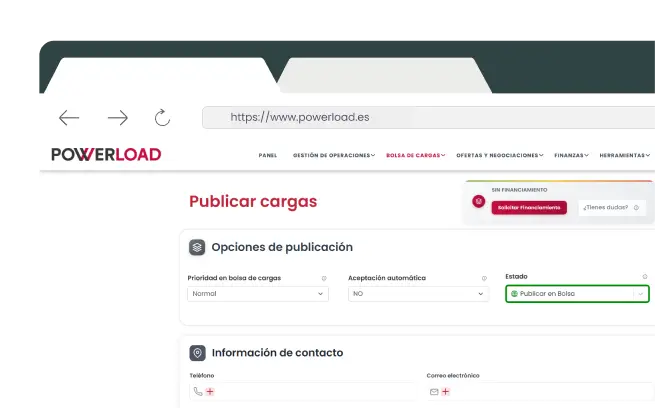
Introduce los Detalles de la Carga
Rellena los campos obligatorios:
- Tipo de mercancía.
- Peso y volumen.
- Lugar de recogida y destino.
- Fecha y hora de carga.,
- Condiciones especiales.
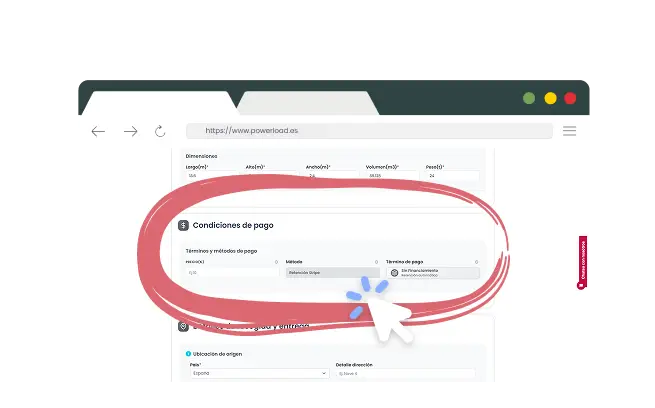
Introduce tu Forma de Pago
Proporciona forma de pago válida (transferencia bancaria máximo 60 días) para abonar al transportista cumpliendo normativa legal.
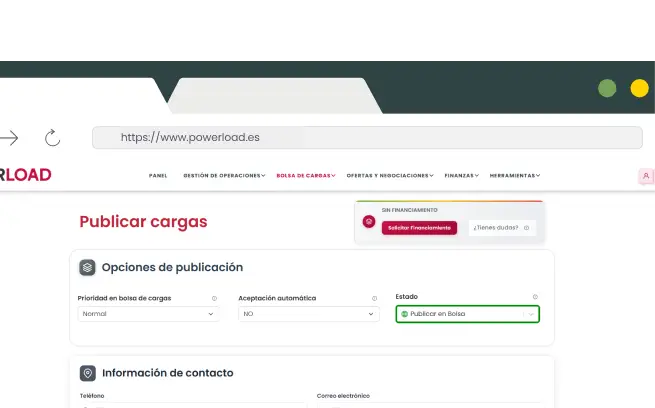
Elige Cómo Publicar
Aceptación automática
- El transportista acepta y se genera orden automáticamente.
Cargas negociables
- Transportistas envían ofertas para negociar condiciones.
Guardar en borrador
- Prepara y revisa antes de publicar
Publicar en primera fila (Plan Oro)
- Máxima visibilidad y mayor probabilidad de aceptación rápida
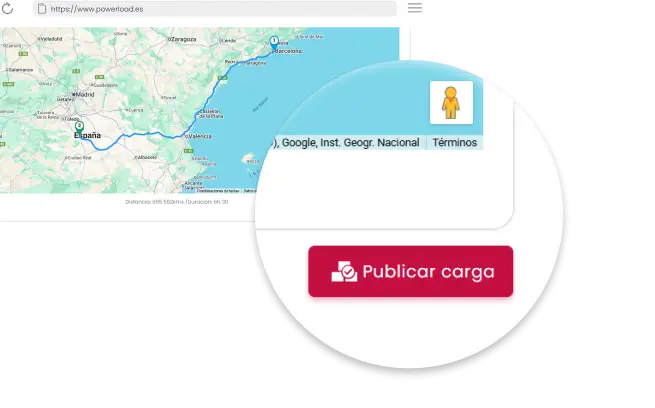
Publica la carga
Revisa toda la información y pulsa “Publicar”. La carga estará disponible para que los transportistas puedan aceptar directamente o enviar ofertas para negociar.
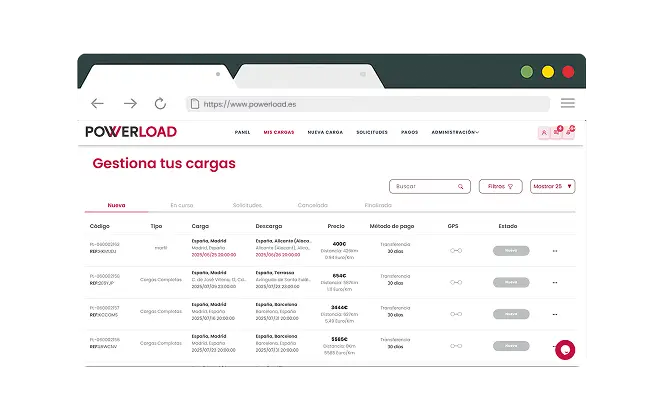
Administra las cargas publicadas
Comprobar que la carga esta registrada en registro de cargas del dashboard de gestión de carga.

Gestiona tu viaje hasta finalizarlo
Revisa información, publica, usa chat integrado para coordinar, sigue ruta GPS en tiempo real y recibe factura automática al completar


